Highlight and hide
Magnify an area with the loupe
The Loupe style puts a glass lens over an area and shows it magnified, while the rest of the screen stays in view.
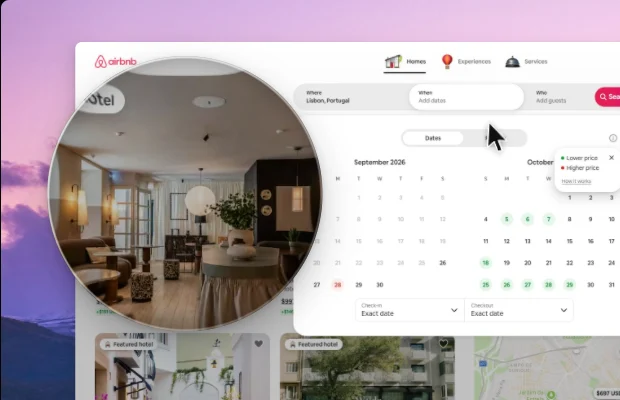
The loupe is a Spotlight style. Instead of hiding what’s around the area, it places a glass lens over it and shows the area bigger. Use it for small text, an icon or a setting that’s hard to read at normal size.
Add a loupe
- Draw a spotlight over the area. See Spotlight.
- In the Spotlight panel, choose the Loupe style.
The lens is centered on the area and grows with the magnification, so it covers more of the screen than the area you drew. For a small lens, draw a small area.
Lens settings
- Round or Square: a round lens is a circle. A square lens follows the shape of the area you drew, and Corner radius rounds its corners.
- Magnification: from 1.25× to 4×. It starts at 2×.
- Fade: the lens pops in, growing slightly as it fades in, and shrinks as it leaves. Turn it off to show the lens at once.
The frame and intensity settings don’t apply to the loupe.
What the lens shows
The lens magnifies everything under it, including the cursor. Masks stay blurred inside the lens, so a magnified email or key is still hidden.
With an arrow
The arrow works with the loupe too. It points at the edge of the lens, not at the area you drew. Turn it on in the Arrow section and drag the blue dots on the video to place it.
Tip: To make every new spotlight a loupe, choose Loupe while no spotlight is selected.
Next step
Can't find what you need? Write to us