Export and updates
Export your video
Choose the resolution, frame rate and quality, pick where to save, and OnScreen renders an MP4 on your computer.
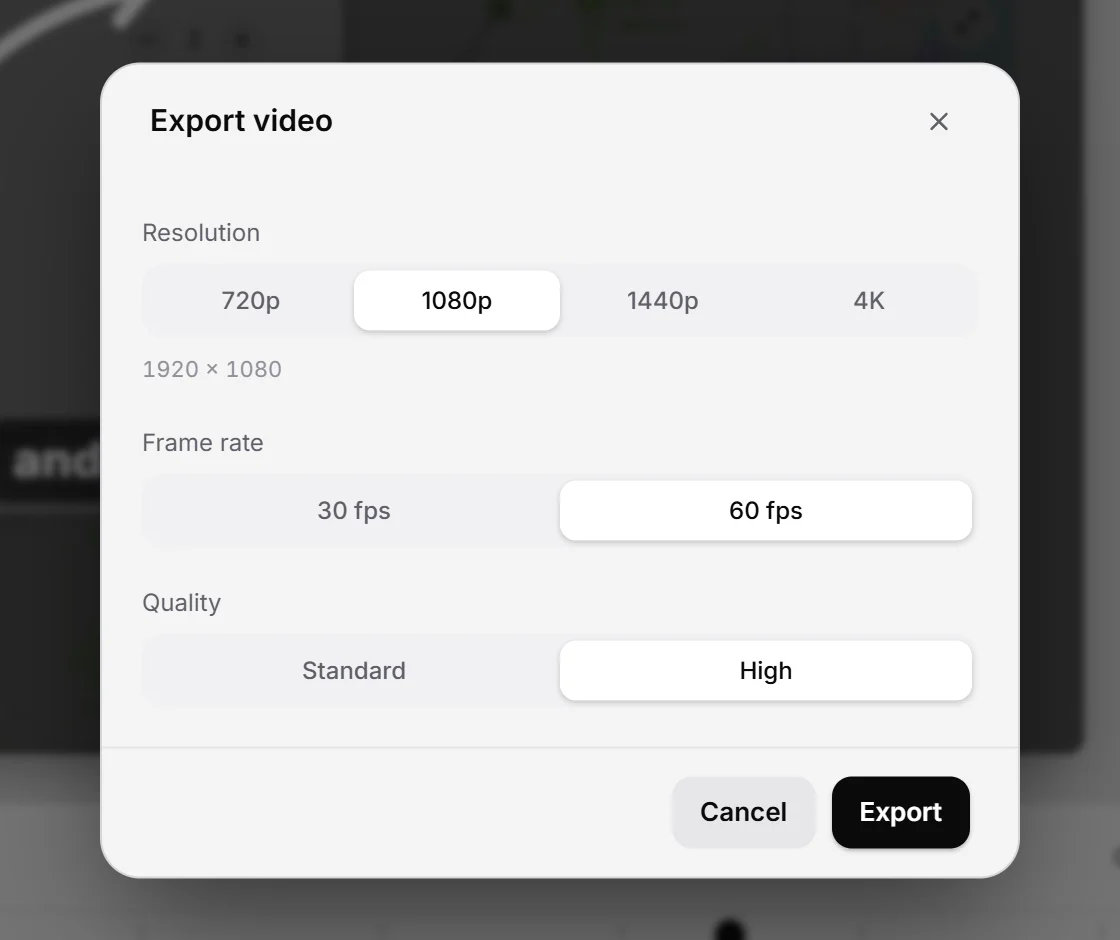
When your edit is ready, click Export in the top-right corner of the editor. The Export video window opens.
Choose the settings
- Resolution: 720p, 1080p, 1440p or 4K. The number is the short side of the video, and the exact size shows under the buttons, for example 1920 × 1080 for 1080p in 16:9.
- Frame rate: 30 fps or 60 fps. At 60 fps, cursor movement and zooms look smoother.
- Quality: Standard or High. High keeps more detail and makes a larger file.
New projects start at 1080p, 60 fps and High, and each project remembers what you choose.
Save the file
- Click Export.
- Choose a name and a folder. OnScreen suggests the project’s name, in your export folder.
- Wait while the window shows Rendering video… with a percentage, and then Mixing audio….
You get an MP4 file (H.264 video, AAC audio) with your microphone, camera and system audio, plus key and click sounds if you turned them on. The whole export happens on your computer, using the graphics card to encode when it can.
Cancel
While the video renders, click Cancel to stop. The unfinished file is deleted. The window can’t be closed during an export, so cancel first if you need to keep editing.
When it’s done
Export complete shows where the file is. Click Show in folder to see it, or Done to go back to the editor.
Where exports go
The save window starts in your Export folder: your Videos folder (Movies on a Mac), unless you change it in Settings ▸ Folders. To open it from the editor, click the arrow next to Export and choose Open export folder.
Tip: For a vertical video, 1080p gives the 1080 × 1920 size that Reels, TikTok and Shorts use.
Next step
Can't find what you need? Write to us